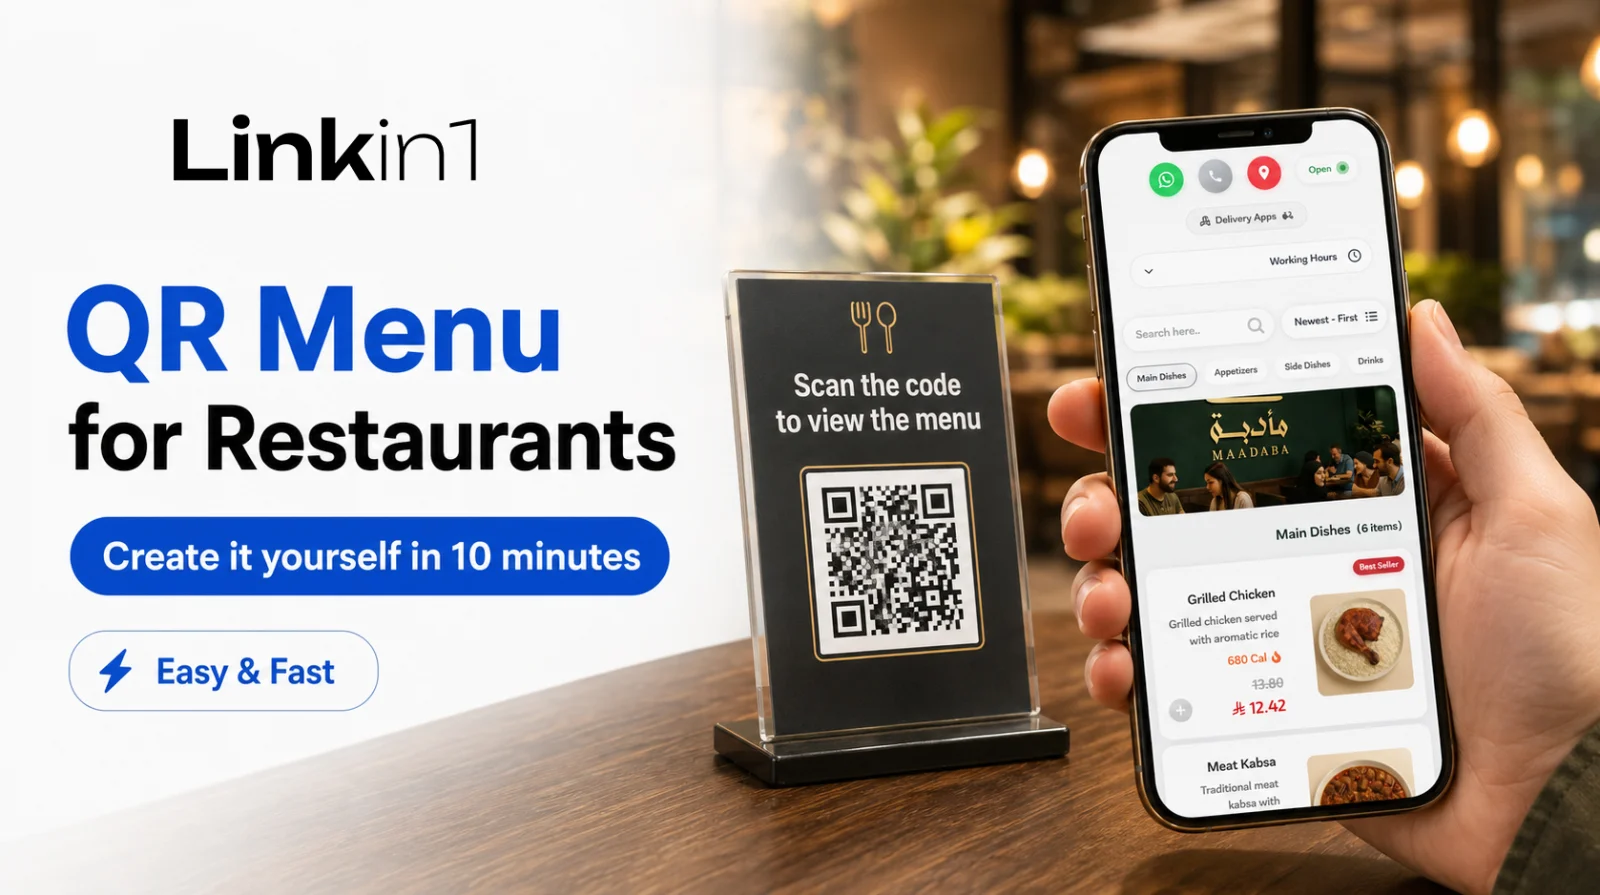
A QR menu for restaurants is no longer a novelty. A guest sits down, points a phone camera at a small code, and a full digital menu opens — photos, prices, calories — and they can order from where they are sitting. No laminated cards to replace, no reprint every time a price moves, no sold-out dish still sitting on the page.
What surprises most restaurant owners is that none of this needs an agency, a designer, or an annual contract. This guide walks you through it step by step until you have a working digital restaurant menu and a printable QR code — in about ten minutes, done yourself.
What exactly is a QR menu?
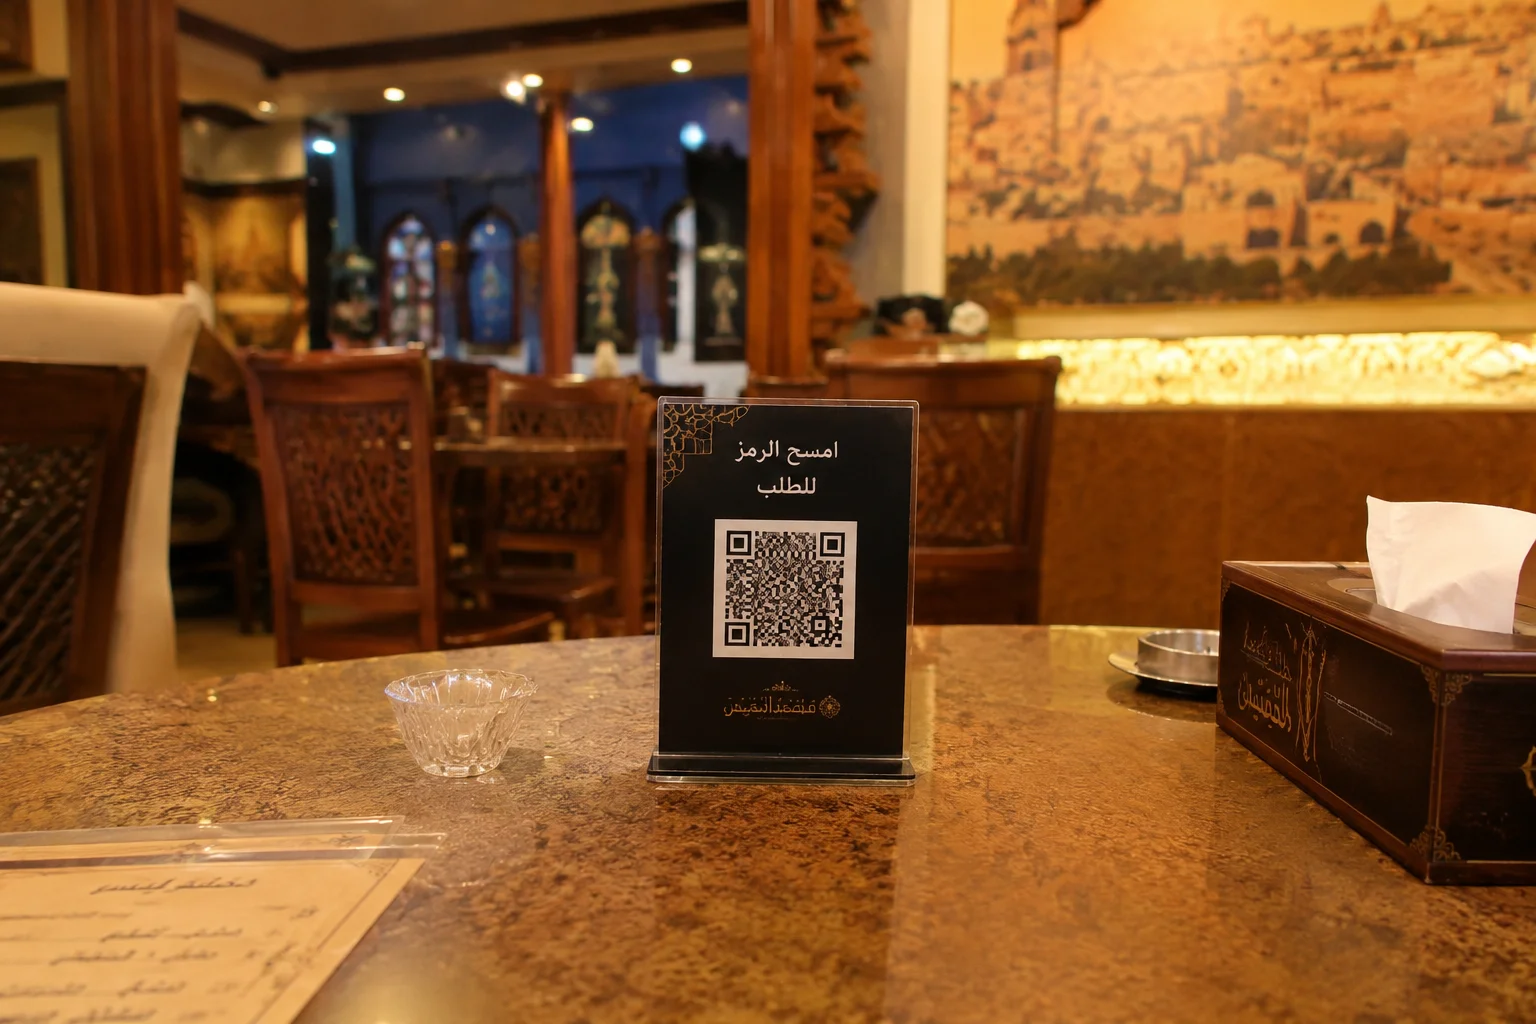
A QR menu is a menu page on the web that guests reach by scanning a code printed on the table, the door, or the receipt. The code itself does not contain the menu — it contains the link to it. That single detail is what makes the whole thing work:
- Change a price in your dashboard and the guest sees it immediately — the printed code never changes.
- Add a new dish or hide one that ran out, with no reprinting and no stickers.
- You can actually see how many people opened the menu — something a paper menu will never tell you.
Before you start: what you need
Less than you think. You need a Linkin1 account, your dish names and prices (your current paper menu will do), and photos if you have them — photos are optional, so you can launch today without them and add them later. The e-menu is part of the Linkin1 PRO plan; you can see what it includes on the e-menu page.
Step 1: Enable the Menu extension (30 seconds)
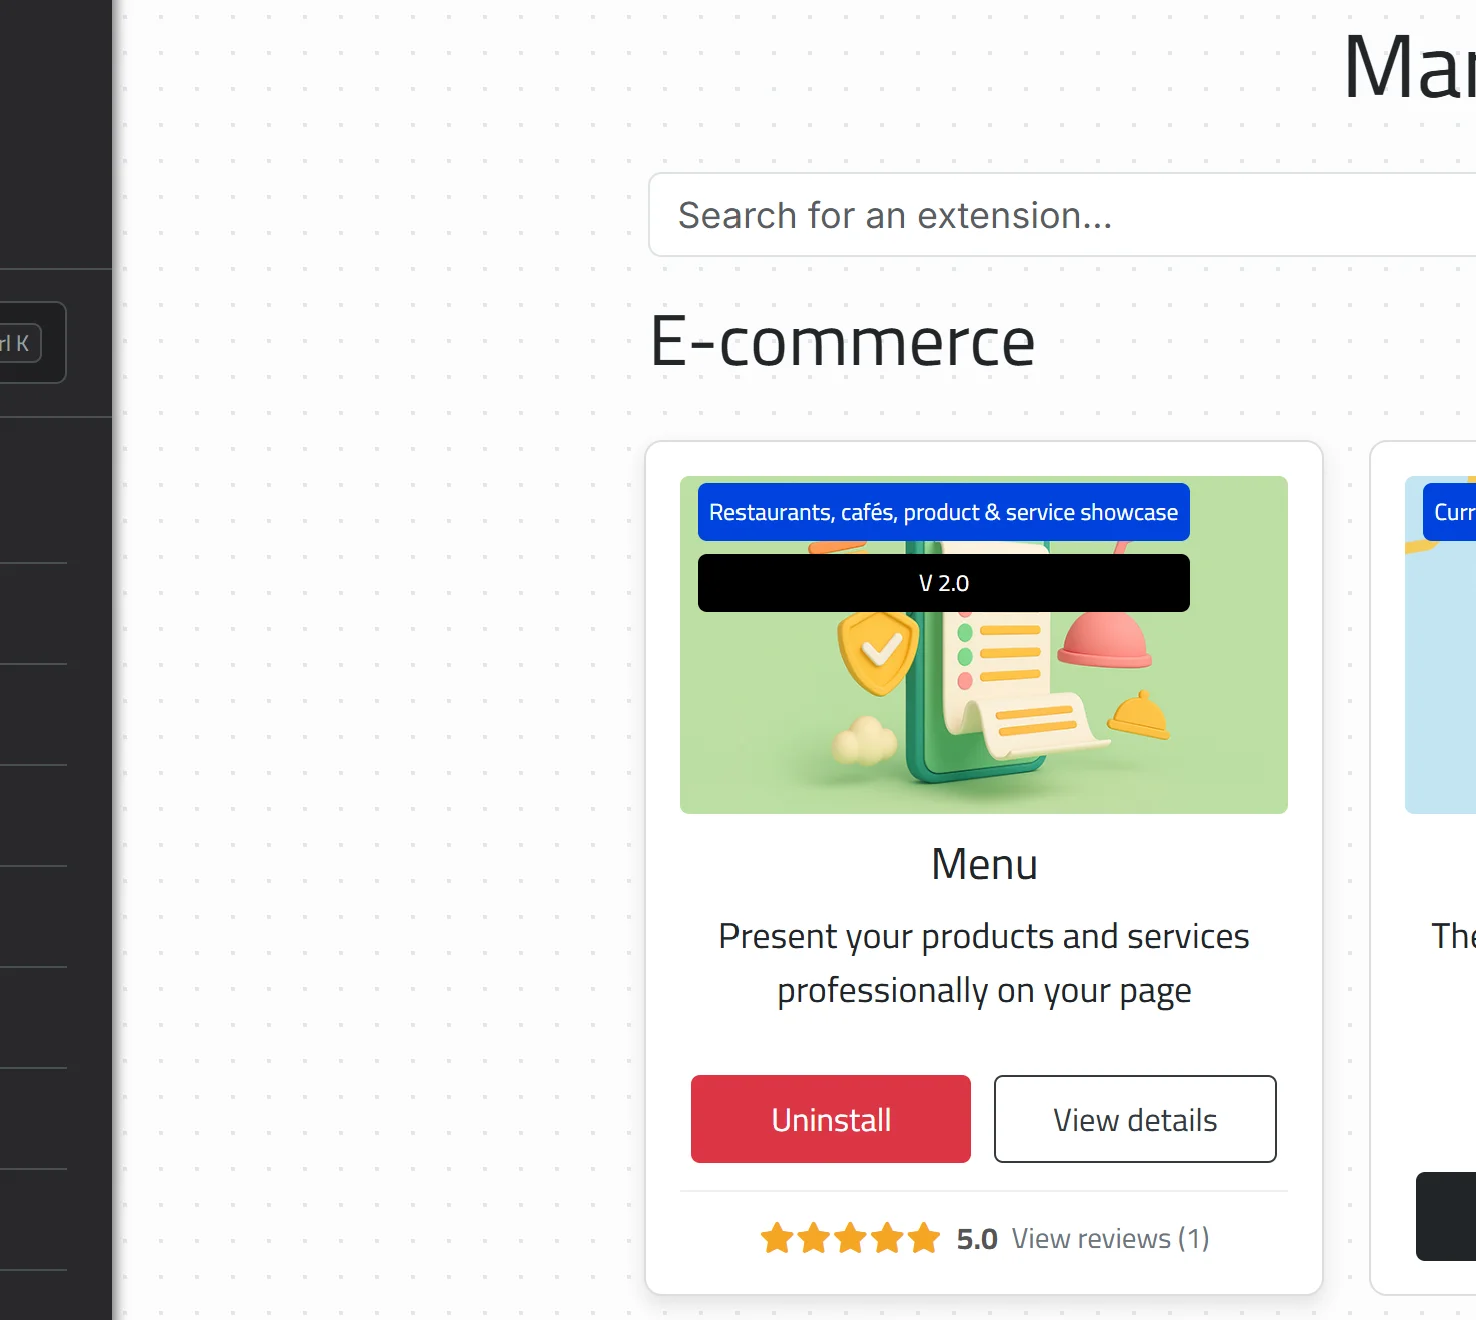
Open your Linkin1 dashboard, go to Extensions, find Menu under the E-commerce section, and hit Install. That is the entire step — no settings, no code.
Step 2: Create your categories first (1 minute)
Do not start with dishes. Start with categories: Pies, Hot Beverages, Cold Beverages, Desserts… and then drop each dish into place. The reason is practical: your guest is on a small phone screen, and categories are what save them from endless scrolling and get them to what they want in two seconds.
If a category gets large, you can create a sub-category inside it (say "Specialty Coffee" inside "Hot Beverages"). And one rule from menus that actually perform: stay under 6 top-level categories. Beyond that you are confusing people, not organising them.
Step 3: Add your dishes (5 minutes)
This is where most of the ten minutes goes, which is exactly why you should start with your 5 best sellers only and publish, then fill in the rest at your own pace. For each dish you can set:
- Name, description and price — a good short description often sells better than the photo.
- Up to 5 images per dish, in the order you choose, or no image at all.
- Calories — optional, and required by regulation for many food businesses in Saudi Arabia.
- A discount with an expiry time, so the old price shows struck through next to the new one.
- Custom badges with your own text and colour: "Best selling", "New", "Today's offer".
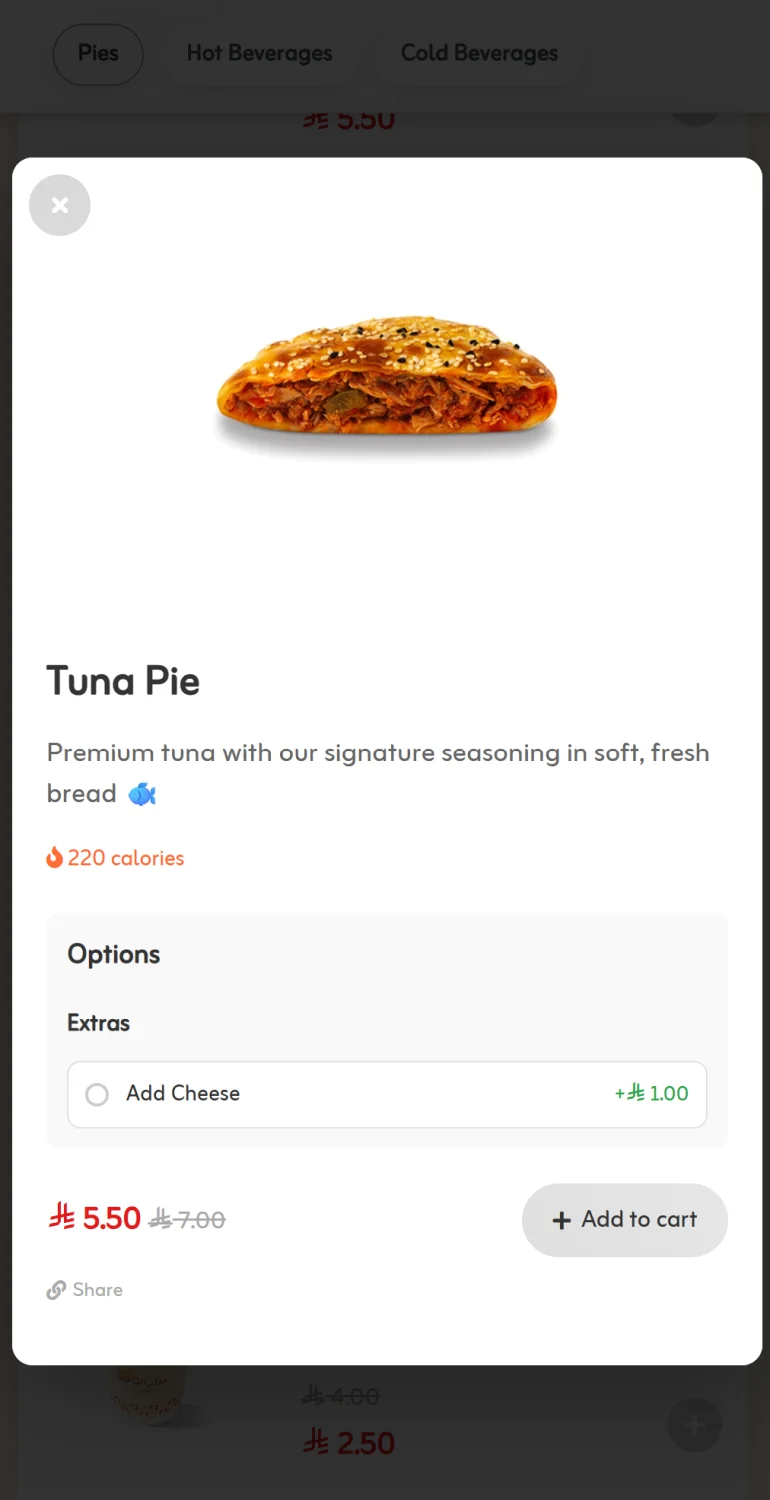
- Options and extras: size, doneness, "Add cheese +1.00" — each value with its own price.
Here is what the guest ends up with: tapping a dish opens its details, its options, and an Add to cart button.
Step 4: Set currency, tax and working hours (2 minutes)
In the menu settings, set your currency and tax rate once and they apply to every dish. If you prefer cleaner numbers, you can round prices and hide the decimals entirely.
Then add working hours for each day of the week, and an Open / Closed indicator appears at the top of the menu automatically. For the times when your hours change — Ramadan, public holidays — you can add special dates that override the regular schedule.
If you run more than one location, give each branch its own menu, address and directions button, and the guest picks their branch at the top of the page.
Step 5: Generate your QR code and download it (1 minute)
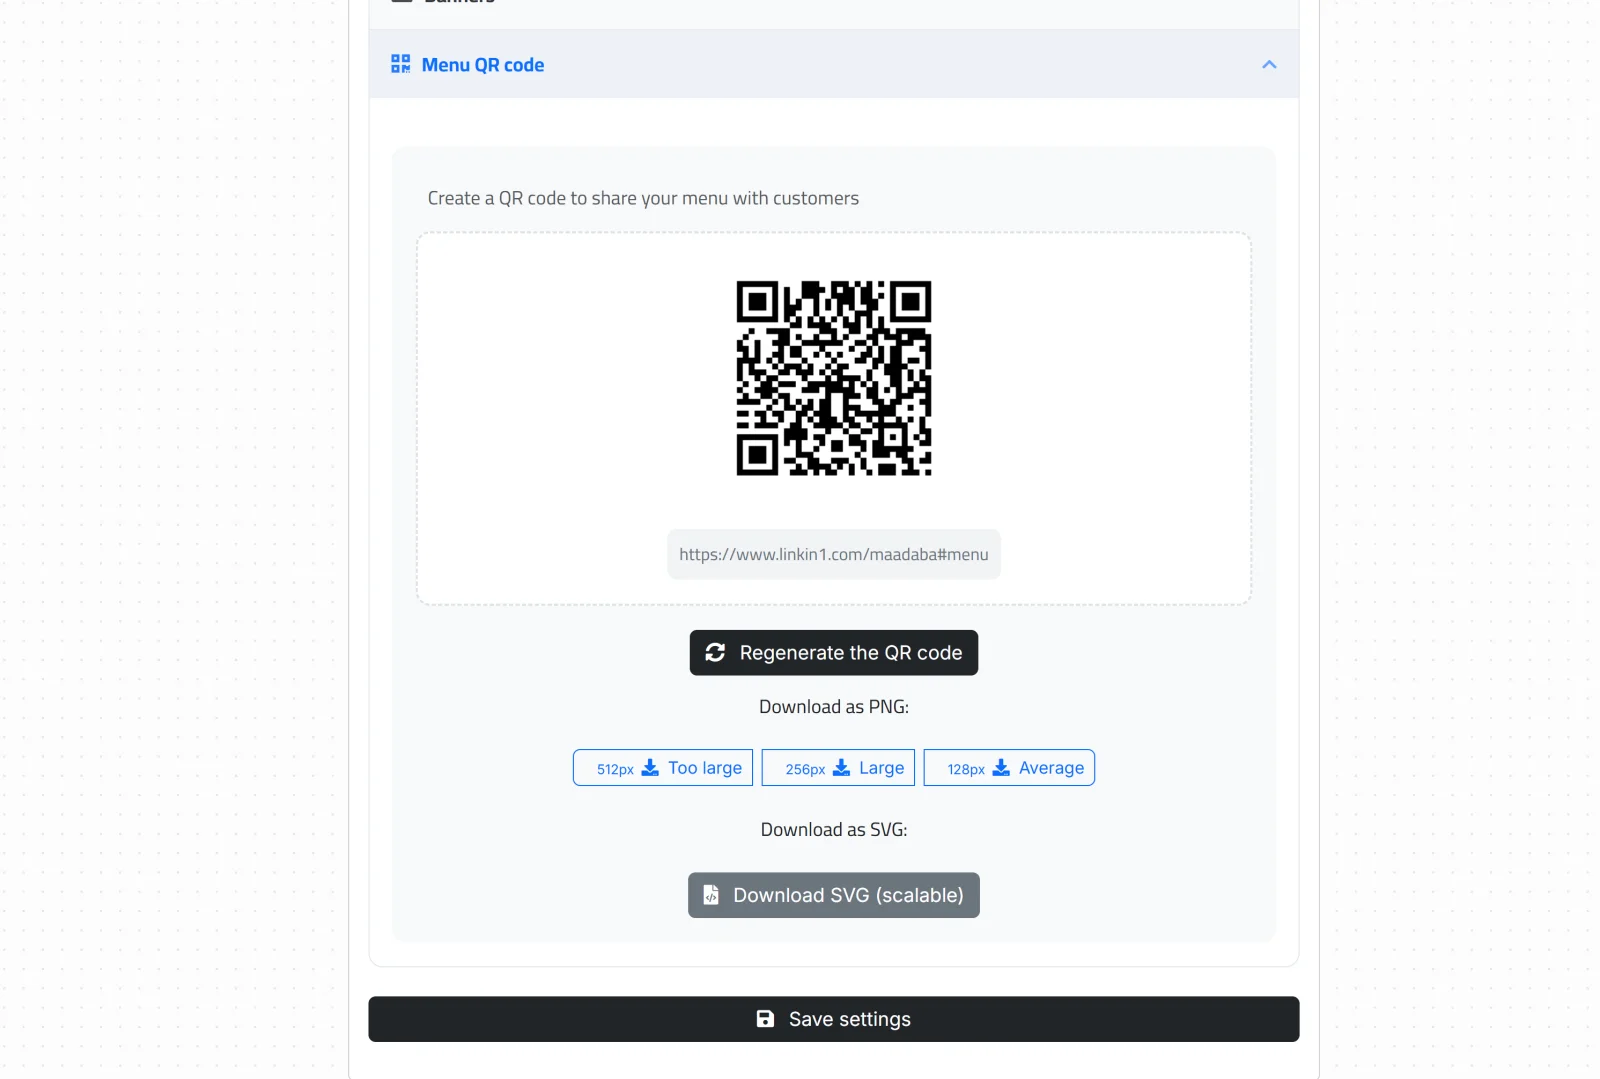
Scroll to the Menu QR code section in the extension settings and hit generate. You will see the code and the link behind it, with download options:
- PNG in three sizes (128px, 256px, 512px) — good for digital use and small prints.
- SVG — a vector format that stays sharp at any size, and the right choice for anything printed large: a table stand, a poster, or a window decal.
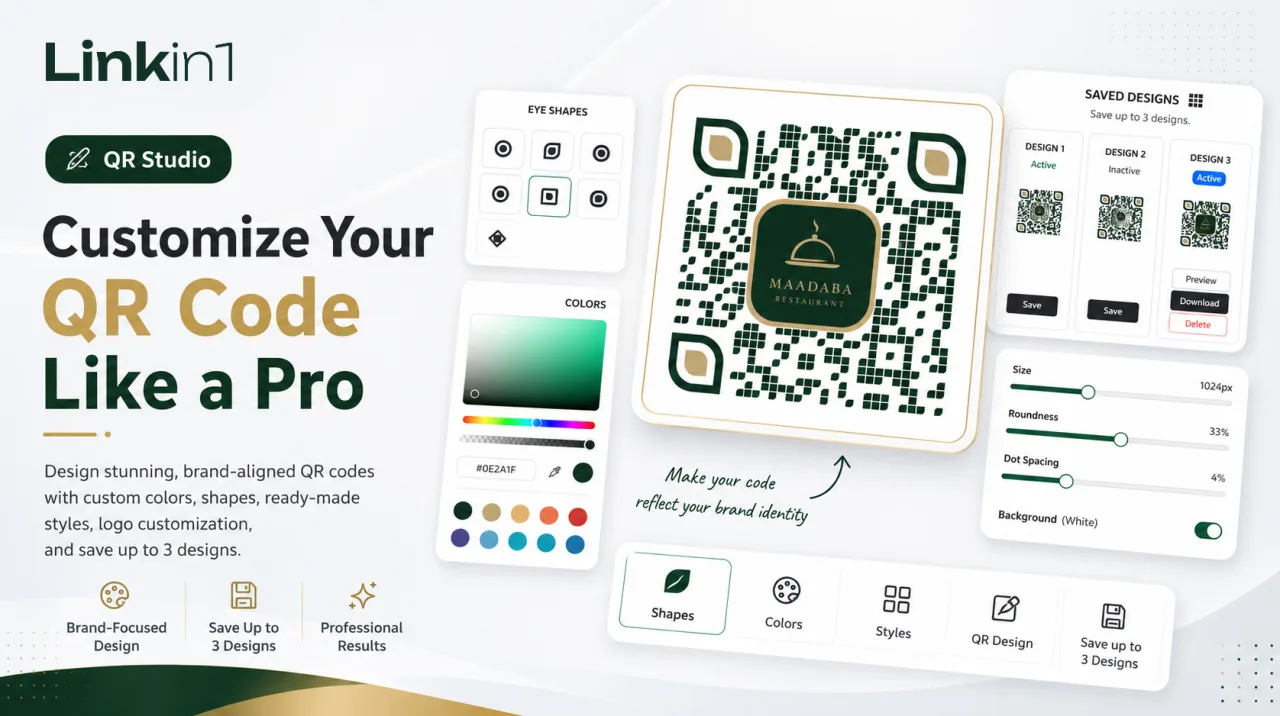
You can also generate a separate QR code per branch, and even one per table tied to its branch — which is what later unlocks ordering and paying from the table itself. And if you want a code in your brand colours with your logo in the middle instead of plain black and white, read the guide to designing a custom QR code with QR Studio.
The result: what your guest sees
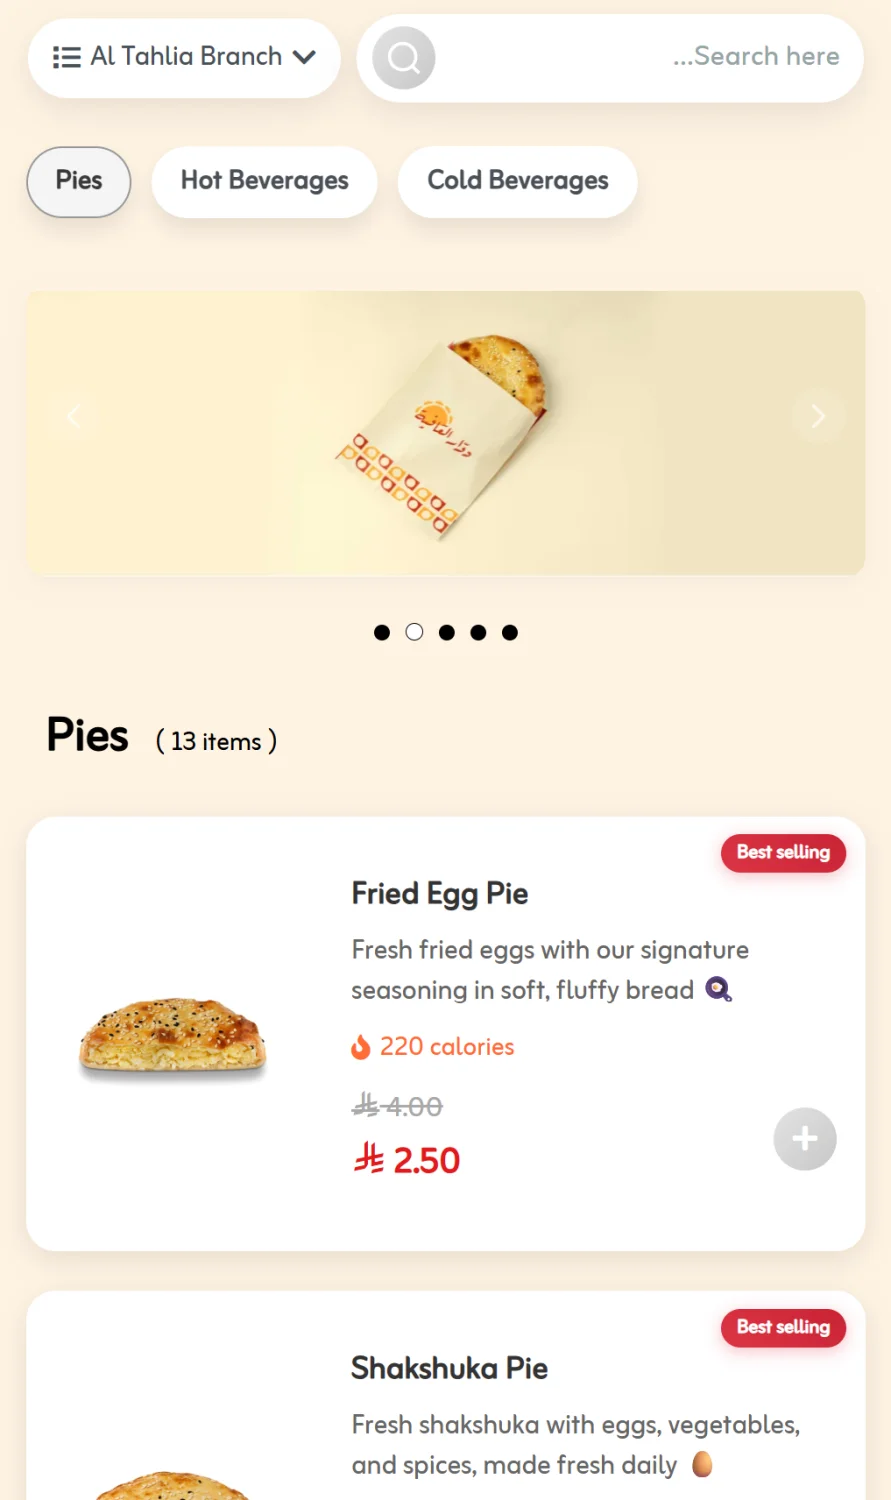
Scan the code with your own phone before anything else. What you will get is a tidy menu: the branch switcher at the top, a category bar, an auto-playing banner slider (up to 5), then your dishes with their photos, prices, calories and badges.
Where do the ten minutes actually go?
| Step | Roughly |
|---|---|
| Install the Menu extension | 30 seconds |
| Create your categories | 1 minute |
| Add your first 5 dishes | 5 minutes |
| Set currency, tax and working hours | 2 minutes |
| Generate and download the QR code | 1 minute |
| Total | About 10 minutes |
Adding the rest of your dishes after that is a matter of time, not setup — the menu is live and its code is printable from the first minute. And if you already have a long list ready, you can import dishes from an Excel file instead of typing them in.
After the menu: from display to orders
Everything above gives you a menu that shows. The next step is a menu that takes orders, and it lives in the same extension:
- A cart the guest adds to, with a running total.
- Card payments through the Moyasar gateway, or cash on delivery.
- Home delivery, branch pickup, curbside handover, or ordering and paying at the table through that table's own QR code.
- Ordering over WhatsApp for guests who prefer the simplest route.
- An instant notification for every order via a Telegram bot — no need to keep the dashboard open.
- Delivery apps: enable them, reorder them, and give each one its own link per branch.
Tips so your code works in the room, not just on screen
- Print from the SVG, never from an enlarged image — a blurry code does not scan.
- Do not go below 2.5 cm × 2.5 cm on a table, and go bigger on posters people read from a distance.
- Leave a white margin around the code; codes printed flush to the edge fail constantly.
- Add one clear line above it like "Scan the code to view the menu" — plenty of people will not act on a bare code.
- Test it on several phones, in your restaurant's actual lighting, before the final print run.
- Avoid glossy surfaces and glass that throws light straight back at the camera.
Where should the QR code go in your restaurant?
Placement decides how often the code actually gets scanned. The restaurants with the highest scan rates put it in several places, not one:
- A stand on every table — the first and most important spot, and an angled stand facing the seated guest beats one lying flat.
- The storefront or the door — it lets someone walking past check your prices before they come in, which is a real decision moment.
- The counter and the waiting area — the minute a guest spends standing is the best minute they will ever spend browsing your menu.
- Takeaway bags and receipts — this is what gets your menu reopened after they leave, and it is where the next order comes from.
- Your delivery car or a window decal, if you run your own delivery.
And because the extension generates a separate code per branch and per table, you can later tell which branch — and even which table — an order came from, instead of one lump number that tells you nothing.
Common mistakes worth avoiding
- Copying the paper menu across as-is. A digital menu is not a photograph of a printed one — shorten the descriptions and keep the categories tight.
- Uploading a PDF instead of a real menu. A PDF on a phone means constant pinching and zooming, no ordering, and no way to show an offer.
- Leaving sold-out dishes visible. Hiding a dish takes seconds and saves an apology at every table.
- Forgetting tax. Set it from the start so the total never surprises anyone.
What does it cost?
The e-menu in Linkin1 is part of the PRO plan: 59 SAR per month, or 479 SAR per year — about 40 SAR a month on the annual plan. Set that against the cost of printing a single menu run for a mid-sized restaurant, repeated every time a price or a dish changes, and the comparison does not need a calculator.
For a fuller tour of what the menu can do, read the complete guide to the e-menu.
Frequently asked questions
In short
A QR menu for restaurants is not a technical project — it is a five-step setup: enable the extension, create your categories, add your dishes, set currency and working hours, then download and print the QR code. Ten minutes stand between you and a menu that updates instantly, never needs reprinting, and can later take orders and payments.
Start now from the e-menu page and build your restaurant's menu yourself today.